- Step 01
Create your account
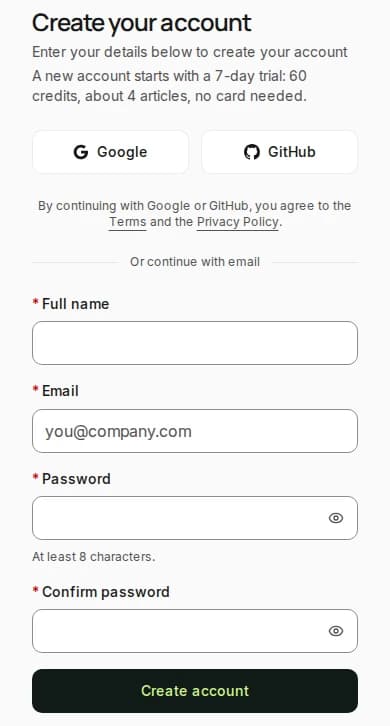
Visit the Rext AI signup page and enter your details:
- Full name
- Password
- Confirm password
Click Create account. You're in. Or sign up with Google or GitHub instead.
- Step 02
Set up your workspace
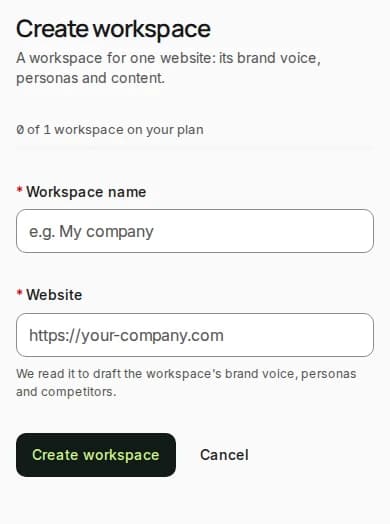
After you sign up, create your first workspace.
What is a workspace?
A workspace holds one brand or client: its website, brand voice, author personas, keywords and articles.
How to set it up:
- Enter the Workspace name and your Website
- Click Create workspace
What happens next?
Rext AI reads your website to draft the workspace's brand voice, author personas and competitors.
Once the analysis is complete:
- The workspace opens on Settings › Brand voice with the draft
- Change anything that doesn't sound like your brand
- The writer follows this voice in every article
Your workspace is now ready.
- Step 03
Search a keyword
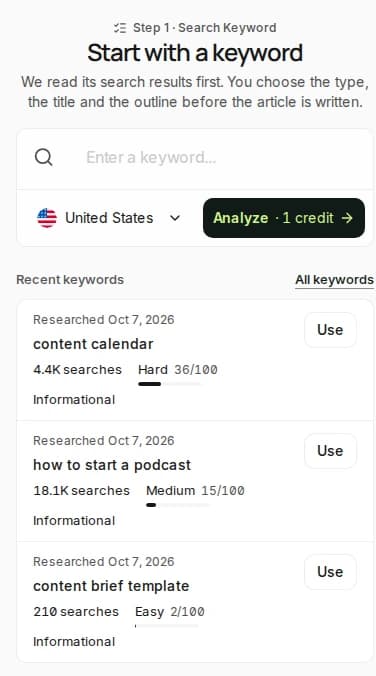
- In the sidebar, click Generate
- Enter your keyword, choose the country, and click Analyze (1 credit)
- Or start from a keyword you analyzed before: click Use beside it under Recent keywords, or open All keywords
Rext AI reads the search results for your keyword and shows its difficulty, search intent and monthly volume, with related keywords to choose from.
- Step 04
Select a keyword
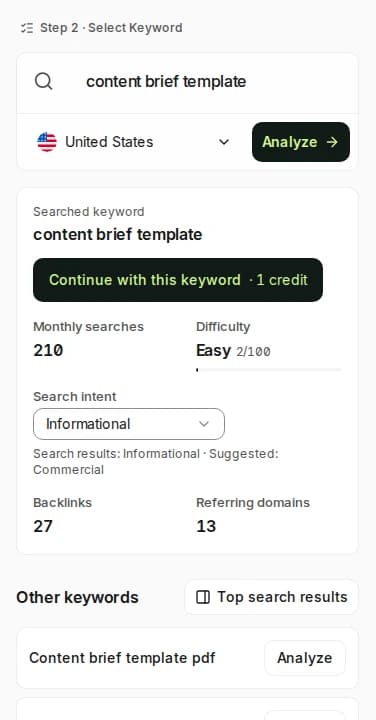
Keep the keyword you searched or pick a related one, then click Continue with this keyword (1 credit). Changing the keyword later costs 1 credit.
- Step 05
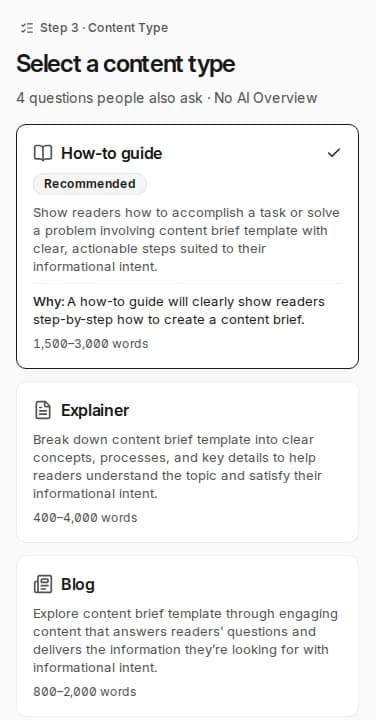
Select a content type
Rext AI lists the content types that fit the search intent and recommends one, with a word range for each. Choose the type and continue.
- Step 06
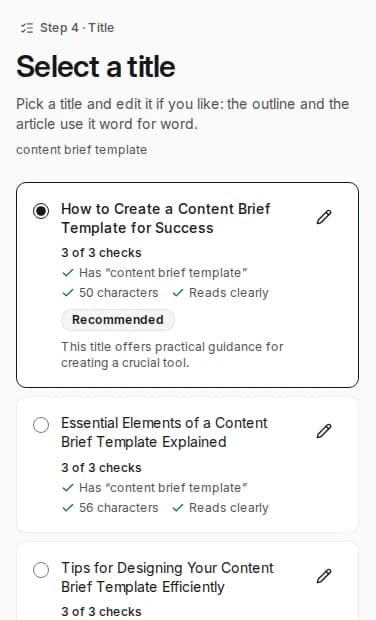
Select a title
Rext AI writes five titles that keep your keyphrase and recommends one.
- Pick a title and edit it if you like: the outline and the article use it word for word
- Or describe what you're looking for and regenerate the five
- Step 07
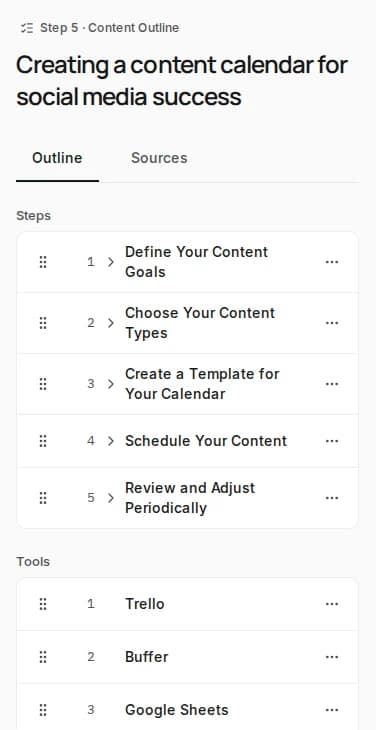
Review and approve the outline
Rext AI drafts the outline: the sections with their key points, and the brief beside them.
- Set the tone, the audience and the target words
- Check the focus keyphrase and the keywords to include
- Keep the suggested author persona or pick another
- Include a mention of your brand, or leave it out
Not right? Click Regenerate for a new outline (1 credit). When it is, click Approve and generate.
- Step 08
Review your article
The run goes through its stages: Research, Draft, Style pass and Checks. The side panel lists each web search as it runs, and you can leave the page: the run continues, and you are told when the article is ready.
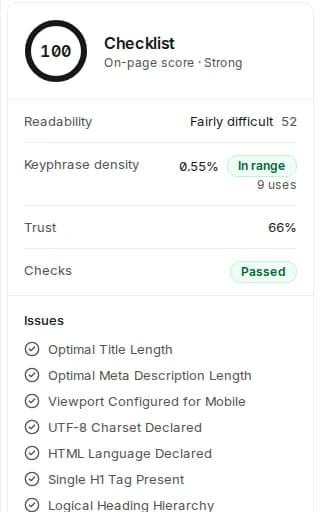
The finished article opens with its Checklist:
- the on-page score and its band: Strong, Good, Fair or Needs work
- readability and keyphrase density
- Trust, as a percentage
- the checks and the issues to fix
- Claims to verify: any claim without a source
Read the draft, check the claims, and edit what you need.
- Step 09
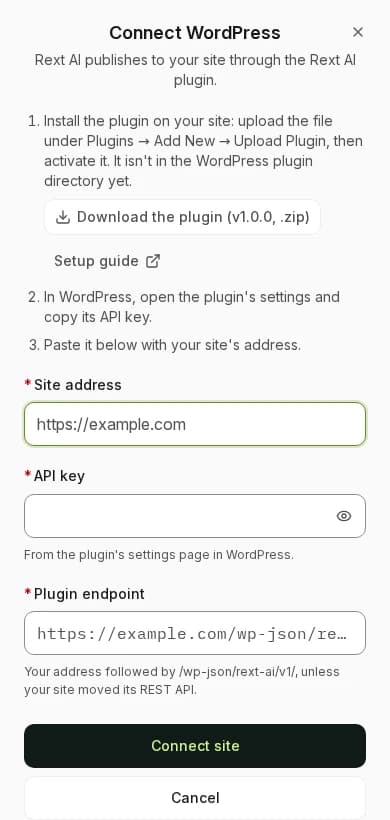
Publish to WordPress
Connect your WordPress site once, under Setup › Integrations, with the Rext AI plugin. Then, on a finished article:
- Open the publish menu above the Checklist
- Choose Publish, Save as Draft, Submit for Review or Schedule for Later
- Confirm
No copy-pasting. No manual uploading.
The article goes straight to WordPress, credited to its author persona. For any other system, copy it as HTML, Markdown or plain text.


You're ready to write
Pick a keyword, approve the outline, and publish when the article is right.
Start free trial